Leanne Feener @ DiMascio Group Real Estate

Pages

  • Home

Thursday, December 1

How to keep your Washing Machine clean

Marianne Lipanovich

Just because you fill your washing machine with laundry detergent doesn’t mean you don’t need to clean the machine itself. It sounds counterintuitive, but while your machine is ridding your clothes of dirt, it doesn’t always rid itself of that same dirt or a buildup of detergent residue. 

In addition, the newer HE (high efficiency) machines are especially prone to developing mold and mildew, especially if you live in an area with high humidity levels, which can lead to an odor developing both in the machine itself and on your “clean” clothes. “We take our washing machines for granted,” says Taryn Brucia, a public relations director at LG Electronics. “They do some dirty jobs. We should give them some love.” With that in mind, here’s how to clean a washing machine.
Farmhouse Laundry Room by Meriwether Inc
Meriwether Inc
How Often? 

Most manufacturers recommend cleaning the machine once a month, although a quick internet search and survey of friends and family will confirm that the majority of us are still wrapping our heads around the idea of cleaning the machine. 

Others, though, clean theirs even more often. “I have a separate cleaning cycle as an option on my washing machine and run that cycle after I wash cleaning rags every week,” says Becky Rapinchuk of Clean Mama. Fortunately, the process is fairly painless, especially since the machine itself does most of the work.

Identify Your Machine and Select Your Cleanser

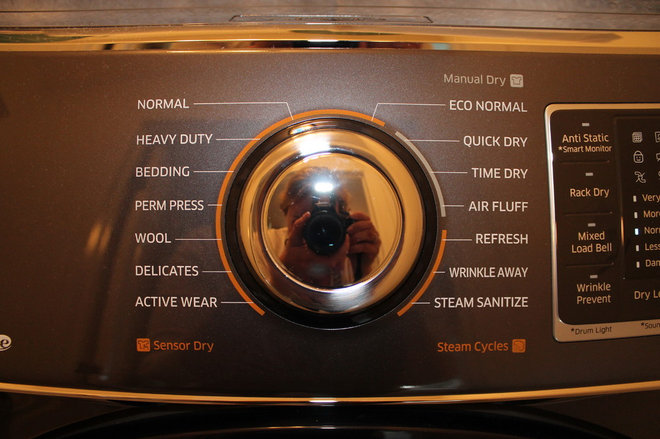
The type of washing machine you have will dictate which method you use to clean it. HE front loaders and top loaders need one approach; top-loading non-HE machines need a slightly different approach. 

Before you start, decide what type of cleanser you want to use: white vinegar, bleach or a commercial cleanser. Vinegar is nontoxic and readily available, making it a favorite for both Brucia and Rapinchuk, but some manufacturers recommend bleach or other chemical cleansers, so check the manual for your machine. If you are using a commercial product, follow the label’s instructions for the recommended amount. 

Caution: Choose only one cleanser. You never want to mix these products. 
For HE Washers (Front Loading or Top Loading)
A monthly cleaning is especially important if your HE machine has developed an odor. “Wiping down the interior of the washer with cleaner, using extra detergent or running everything on the longest, hottest cycle does nothing to help dissipate the scent,” Rapinchuk says, adding that doing this cleaning task will eliminate the odor and keep your washing machine “in tip-top condition.” Many newer machines have a clean cycle, which makes the process even simpler, but the basic procedure is the same whether you have that or not. 
by Clean Mama
Clean Mama
1. Choose the “clean” cycle. If your machine doesn’t have this, select the hottest water setting. In some cases, this may be the setting for whites or heavily stained clothes.

2. Choose the added rinse cycle if it’s available.

3. Fill the bleach dispenser with your cleanser choice.

4. Fill the tub to the highest level (this will probably be automatic with the clean cycle) and run the machine.

5. If you don’t have a second rinse cycle, run the rinse cycle again manually.
Clean Mama
Once the cycle has ended, use a microfiber cloth dipped in vinegar to clean the gasket that seals the door and the area around it. “Carefully pull it back and inspect to see if you have mold, mildew or socks (as is the case with mine) underneath,” Rapinchuk says. 

Don’t overlook cleaning the dispensers. Use vinegar or soapy water to wipe any detergent, bleach, fabric softeners or other laundry add-ins from the dispensers. “You can often just pop them out,” Brucia says. Wipe off all these areas with a cloth dipped in water and dry them with a microfiber cloth.


Finish by wiping down the controls and the outside of the machine with a microfiber cloth dipped in vinegar or an all-purpose spray. To make the exterior shine, dry with a microfiber cloth.
Contemporary Laundry Room by Mosby Building Arts
Mosby Building Arts
For Top-Loading Non-HE Washers
Although older machines don’t generally have a cycle for cleaning, you can easily create your own version. It involves a bit of a wait time between beginning the cycle and ending it, so use that time to clean other areas that won’t be reached by the water in the tub.

1. Choose the hot water setting and the longest cycle.

2. Fill the tub to the maximum level, then pause the machine.

3. Add 4 cups of white vinegar or 1 cup of bleach to the water and let the machine agitate for a minute or two. 
Nor-Son, Inc.
4. Pause the machine and let it sit for an hour. Dip a microfiber cloth into the soaking solution, wring it out and use it to clean the top of the drum and agitator (where the water doesn’t reach) and the inside of the lid. 

If you can remove the bleach and fabric softener dispensers, do so and clean the areas beneath them with the cloth and cleaning solution as well. If they are fixed in place, clean them and the area around them. “Using vinegar will help eliminate the detergent buildup,” Brucia says. 


Finally, clean the control panel and the outside of the machine with the cleaning solution or an all-purpose spray. Use a dry microfiber cloth to dry and polish the surfaces. 

5. Restart the machine and finish the cycle. “You won’t smell the vinegar, but if you do, simply add another rinse cycle,” Rapinchuk says. 
CTA Architects Engineers
Daily (or Almost Daily) Care
The experts also have some advice for preventing a buildup of dirt and odors between cleanings. If mold and mildew are a problem, leave the machine’s door or lid open after you finish a load of laundry so that the interior will dry out completely. Before you do this, make sure curious children and pets can’t get into the machine, especially if it’s a front-loading one. Some machines have latches designed to keep the door ajar without leaving it wide open. 
Brucia also recommends wiping down the door or lid to get rid of any condensation. Wiping and drying the gasket around the door every time you finish a load of laundry will help prevent a buildup of dirt in that area. As a final tip, be sure to use the correct amount of detergent for your loads.


www.teambluesky.ca

Posted by Leanne Feener at 12:30 PM No comments:

Wednesday, November 23

DUCT CLEANING - What to know before you hire

David Bounsall

Duct cleaning is not a DIY project. It requires specialized equipment, including a high-powered industrial vacuum that takes the debris out of your home into a truck. Our Home Renovation Survival Guide offers helpful tips on how to select the right company for the job.  These include reading homeowner reviews, getting quotes from three companies and asking for references from recent customers. Whether you’re searching for a duct cleaning specialist or are still in the early phases of learning about your ducts, there are many things to consider before you hire. We spoke to Adel Majd of 416-SO-CLEAN to find out what homeowners need to know before having their ducts cleaned.
Frequency.
A general rule of thumb is every five years, but how often you get your ducts cleaned depends on several factors: Do you have pets or allergies to dust? Have you just finished a renovation leaving fine powdery dust everywhere? Has water entered the air system through a leak or flood causing mould to grow in the ducts? Although a substance may look like mold, a positive determination of whether it is mold or not can only be made by a laboratory. For about $80, this microbiology lab can tell you whether a sample sent to them on a clear strip of sticky tape is mould or simply a substance that resembles it.
Duct interior view before & after
Interior view of duct before & after
According to Adel Majd of 416-SO-CLEAN, “To determine if your ducts need to be cleaned, remove the cover of the main floor cold air return vent on the wall, then look inside with a flashlight for accumulation of fine dust.”The best way to extend intervals between duct cleanings is to prevent foreign material
The best way to extend intervals between duct cleanings is to prevent foreign material like dirt or water from entering the ducts in the first place. Supply vents deliver warm or cool air from the furnace throughout the house. Since they are usually on the floor they can collect dust and debris, so remove the grills or floor registers and vacuum inside the vent periodically. Consider a ‘no shoes in the house’ policy. Replace your furnace filter every Spring and Fall with a high-quality HEPA (high efficiency particulate air) filter.
Cost.
Based on over 1,800 HomeStars duct cleaning reviews written in the past 12 months, the average cost for duct cleaning is about $400, ranging from $377 in Ontario to $413 in Alberta.
What you should expect.
It helps to understand how your HVAC (Heating, Ventilation and Air Conditioning) system works. This infographic provides a simplified overview of a standard HVAC system. A more detailed explanation is in this 7-minute video, courtesy of 416-SO-CLEAN.
Ask before the work begins.
Before the work begins, ask them to describe their entire process in detail. First, they should check for asbestos if it’s an older home. It’s very rare, but if it’s present, hire a specialist to remove this proven carcinogen. Ask to see the access port once opened – it’s usually 8″ to 12” in diameter located near the furnace and it must be resealed airtight after the job is done.  416-SO-CLEAN recommends both localized contact cleaning inside each vent and centralized vacuuming of the entire system. Because duct cleaning can stir up dust, cover carpets and furnishings.
According to the US Environmental Protection Agency, if a service provider fails to follow proper procedures, duct cleaning can cause indoor air problems. For example, an inadequate vacuum system can release more dust and dirt than if you had left the ducts alone. A careless or inadequately trained service provider can damage your ducts or HVAC system, possibly increasing your heating and air conditioning costs or forcing you to make costly repairs or replacements.
Be cautious.
Let’s face it, we’ve all been annoyed by those calls trying to sell you duct cleaning services. Beware – you’re likely not speaking to a duct cleaning company. Adel Majd of 416-SO-CLEAN says that “chances are, you’re actually speaking to a telemarketer at a call centre. They earn money by generating sales leads to sell to contractors.” If you take the bait and agree to have duct cleaning services, they will sell your sales lead to the highest bidding company and take a hefty commission.
Also, beware of ‘bait & switch’ tactics where they sell you on a discounted basic service then add on expensive extras once the work begins. Understand what’s going to be done and get it in writing with an estimate that you’ve signed before the work begins. Be sure to read reviews and get quotes from multiple companies. Start on HomeStars and find a duct cleaning specialist in your area today.
Posted by Leanne Feener at 12:00 PM No comments:

Monday, November 21

NOVEMBER TO-DO's Home Checklist

Laura Gaskill - Houzz


With the winter holidays just around the corner, there is a lot to look forward to (and prepare for) at this time of year. Batten down the hatches for winter weather and get a jump on holiday hosting prep, so you can relax and savour the many simple pleasures of the season, from big family dinners to walks in the crisp air outdoors.


Cummings Architects
Get a jump on holiday prep. If you plan to host this holiday season, take a bit of time now to prepare a few things in advance. Launder and iron the fancy linens (roll up freshly ironed linens on old wrapping paper tubes to prevent wrinkles), drop off the kitchen knives for a professional sharpening or polish some silver — you’ll thank yourself later.

Contemporary Dining Room by Jessica Helgerson Interior Design

Jessica Helgerson Interior Design
Replace floor protectors on chairs. Don’t let dining chairs do damage to your hardwood floors: Check their feet and add or replace floor-protecting pads if needed. Felt pads come in self-adhesive and nail-in varieties; if you’re using the self-adhesive type, be sure to clean the base of each chair foot thoroughly and allow it to dry before applying.


Anne Sneed Architectural Interiors

Deep-clean bathrooms. Aim to schedule a deep cleaning of the bathrooms a week before entertaining, so that a quick surface wipe-down will be all you’ll need to get things looking spotless again on the big day. If you’re hosting Thanksgiving, goodness knows there are plenty of other things to worry about — like how you’re going to fit a turkey and five side dishes in the oven!

Transitional Basement by Interior Options

Interior Options
Check the sump pump. If you have a sump pump in your basement as protection in case of flooding, be sure to check it and make sure it is working properly before the rainy season really gets going, and repair or replace it as needed.


Bohler Builders Group, Inc.

Show some kindness to feathered friends. Nonmigrating birds can use some extra help when wild food becomes scarce and water sources freeze. Stock up now on birdseed so you can keep those feeders full, and consider providing a water source as well — refresh it daily to prevent mosquitoes.


M James Architecture
Remove the last of the fall leaves. Aim to fit in one final raking and gutter-cleaning session once the last leaves have fallen — but before the first snow.

Inspect the home’s exterior and cover gaps. 
Cover any gaps you find around the exterior of your home that may be large enough for a mouse to enter —it doesn’t takemuch space for these little critters to sneak in. Cover exterior vents with hardware cloth, and attach door sweeps to the bottoms of exterior doors to stop furry creatures from squeezing in when the weather turns chilly.


Wright Design
Stock up for winter. If you live in a region with cold, snowy winters, taking the time now to stock up on winter gear and supplies will mean less stress when that first big storm hits.
  • Check snow shovels and ice scrapers; replace as needed.
  • If you use a fireplace or wood stove, order firewood.
  • Pick up a bag of pet- and plant-safe ice melt.
  • Restock emergency kits for car and home.
  • If you use a snow blower, have it serviced and purchase fuel.

Craftsman Exterior by Moore Architects, PC

Moore Architects, PC
Check paths, stairs and railings for safety. Slips and falls on ice and snow can happen anywhere, but they’re even more likely if the footing is uneven or a railing isn’t sturdy. Take a walk around your home’s exterior, paying special attention to walkways, stairs and railings, and make repairs as needed.


www.teambluesky.ca


Posted by Leanne Feener at 1:06 PM No comments:

Monday, September 19

Prepping your House for Sale

Prepping Your House for Sale

Samantha Goodman on August 13, 2016

In this day and age where image is everything, getting your house ready to sell is more work than the actual move itself. No longer is a simple clean up job going to do the trick. Now people get rid of their furniture and family photos, repaint, and hire a stager to make sure their house looks magazine perfect.
How much you sell your home for really depends on the amount of time and money you can realistically invest in getting it ready. In a perfect world, we’d all like to be able to stick the For Sale sign in the lawn the day we decide it’s time to move on, but life usually gets in the way and the little things like a broken door knob or a loose stone in the walkway gets ignored. While you may have learned to live with your home’s quirks, prospective buyers do not have any interest in them.
If you are thinking of selling, there are certain steps you need to take before you can put that For Sale sign in the lawn. See below for a list of suggestions and links to HomeStars categories for businesses who can help you cross to do’s off your list.
Repair anything that’s broken or not up to par.
Call in plumbers, electricians, and furnace specialists to fix any leaky toilets or taps, light switches and furnace or air conditioning problems you might have. Fix doors and windows that may have been painted shut. Contact a stone mason to repair loose or missing stones in your walkway.
Paint. 
How are your walls holding up? Are there scuffs marks or little hand prints all over the place? Did your cranberry dining room actually turn out raspberry and you never bothered to change it? Now is the time to give your house a fresh look. Paint is the most cost effective way of improving your home’s appearance. If you’re doing the job yourself, take fabric swatches into your local paint store for colour advice. If you can’t spare the time, hire a painter and ask for their advice on colour. While it might not reflect your personal style, a neutral colour scheme is best and attracts the widest audience.

Declutter. 
Less furniture and knick-knacks add up to a more spacious feel in a room — that also goes for the basement and storage closets. If you’re not sure what to do, hire an organizer. Book a storage locker or hire a portable storage container (the container is dropped off at your door and picked up when you’ve filled it), sell anything that’s too good for a garage sale at consignment shops, craigslist, ebay or other on-line auction houses. Give away goods and clothes to rummage sales, Goodwill or other community reuse centres. For junk that is truly un-usable use a junk hauling company or a moving company to take your stuff to the dump. Hold a garage sale if it’s during prime season (spring or fall), but don’t expect to price your items too high, garage sales are really more about getting the stuff out of your house than making money.
Clean, clean, clean.
Now you can clean your house from top to bottom, including the basement and the attic if they have usable space. Hire a cleaner if you’re worn out from all the prep work so far. Don’t forget about getting carpets cleaned, windows washed and the garden spruced up. The outside of the house reflects the inside and should be as impeccable as indoors.
Hire a stager. 
Depending on what your goals are, how much time and money you are willing to invest, and what the maximum return will be on your house will help you determine whether or not you need a stager. If you’re unsure, ask your real estate agent. An agent will advise you as to whether it’s necessary depending on factors such as your neighbourhood, your target market, and the current state of your home.
You’ve finished prepping your home, the open house is coming up, and you’re completely exhausted and frazzled from all the work you’ve done. If you can in any way swing it, take a mini holiday or go stay with your parents or friends for a few days — especially if you have kids. Imagine trying to keep your now picture perfect home clean and tidy with little ones under your feet. Being out of the picture will take an enormous stress off of you and the family.

Posted by Leanne Feener at 11:30 AM No comments:

Friday, September 16

Cottage Closing Checklist


Leslie Andrachuk


The days are getting shorter, and the nights are getting cooler. It’s that time of year again. Summer is wrapping up, and with the kids heading back to school, time to close up  the cabin or cottage sometime soon and enjoy the lovely cool, fall weekends in the city.
If you have a summer cabin or cottage that is not winterized, this means that the closing up procedure is very important in order to ensure your cabin remains safely uninhabited until next summer. Every cottage is different, but here are some basics to keep in mind in the form of a handy-dandy checklist to make sure you hit everything on the list.
Inside the cabin
Aside from giving your place a good cleaning to prepare for winter, here are some specific tips to make your closing up process a little more organized.
  1. Kitchen Cupboards And Fridge
Remove all food from kitchen cupboards and fridge, including dried and canned goods. Defrost your fridge and unplug it. Clean your cupboards and fridge as thoroughly as possible to remove all food particles that might be attractive to animals seeking food and shelter.
Line the shelves in your kitchen cupboards with new shelf paper to prepare for your arrival next spring. Ensure all dishes are clean and put away in their proper places.
Remove all fire hazards including loose papers, newspapers, old rags and chemicals.
2. Beds And Furniture
Mice and squirrels will be looking for a cozy place to make their nest during the winter, and there’s nothing nicer than soft bedding and furniture cushions. Make sure you remove all bedding and place plastic sheets over all mattresses.
Cover any chairs or sofas that have ticking or stuffing with plastic sheets to keep mice and other rodents from destroying your furniture.
3. Water System
If your cabin is not winterized, you will need to fully drain all water pipes prior to leaving. The water supply line can then be filled with non-toxic anti-freeze made especially for supply pipes. And pipes that are carefully wrapped at key junction points are better protected against the cold.
It’s also a good idea to check the inside of your hot water holding tank for residue that can affect water quality and get caught in the faucet screen. If you do not have one already, you might consider getting a water filtration system which can significantly increase the purity level and lessen the wear-and-tear on your cottage water system. You should have your water analyzed regularly by a lab to ensure its quality, especially if the water suddenly displays a yellow or brown tinge.
This is also a great time to thoroughly check your plumbing and faucets to make sure they’re still functioning properly after a summer’s wear-and-tear.
Outside the cabin
Inspect your property and do any landscaping required to prepare your summer home for winter months. Inspect the outside of all your buildings for little holes big enough for critters to use to gain entrance. Plug anything you find with steel wool. If you discover large holes you may want to call a pest control company to come and cover them for you. Remove all garbage and clutter from under your cabin to improve airflow and remove any potential homes for wildlife.
  1. Windows
If you have any broken screens or windows, now is the time to repair.
The best way to protect your cottage from animals, weather and potential break-ins is to board up all your windows. It’s definitely more work than just pulling the blinds, but is worth it for your peace of mind.
2. Sporting Gear And Boats
Safely store your boats away from the water. Do not drain gas from the motor, rather use a fuel stabilizer which you should be able to find from your dealer or auto parts store. Store boat motors, lawnmowers and other items with engines in a dry, weatherproof place such as a shed or inside your boathouse. Cover anything that may rust over the winter with a coat of oil.
Stack canoes, kayaks, paddle boards and any other large water sports equipment somewhere safe and out of sight, and chain together with a solid padlock for good measure.
3. Outdoor Furniture And Cooking Areas
Store any outdoor furniture in the cabin or garden shed, including your picnic table. Clean your barbecue and cover it.

4. Sheds And ToolsDisconnect and remove the propane tank. Store them both in a protected area.
If you have an outdoor garden shed and tools, now is a great time to tend to them so they’ll be ready to help you get the job done come spring. Use your gas-powered tools until you burn all the gas off. Clean all of your equipment and inspect and clean air filters. Spray all moving parts with a lube, and sharpen all blades.
Have a look inside your garden shed and organize it with your freshly maintained tools. You’ll be happy you did so come the spring.
5. Buildings, Roof And Chimney
All sorts of woodland critters will want to make your cabin their home during the cold winter months, but this would obviously not be good for your cabin. Board up your chimney so that animals cannot climb in via the flue and ensure your fireplace damper is tightly closed.
Inspect your roof and replace any missing or broken shingles. Trim overhanging and dead branches to prevent snow buildup which can cause branches to snap, potentially resulting in damage to your cottage.
Clean out your gutters and make sure they are clear of anything that can obstruct drainage when the snow melts in the spring.
6. Dock
Disassemble your dock and store safely. Paint the crib with rust-proof paint to be ready to put it in come spring.

If it’s the correct due date, book a pump or cleaning before your last visit. If your system does not yet need a clean or pump, add some approved “good” bacteria to help break down the waste over the winter months.7. Septic System And Outhouse
If you have an outhouse, remove all toilet paper and give the bathroom area a thorough clean and sweep.
When you leave
  • Disconnect all the appliances and then shut off all the breakers. This will make it easier to reconnect in the spring.
  • Take photos of your cabin and your property, in case anything happens and you need them for insurance.
  • Do a final inspection of all buildings.
  • Check and lock all outbuildings
  • Take all garbage and recycling as well as all personal belongings
  • Lock your cottage.
Closing up the cabin is always bitter sweet, but if you do it properly, all you’ll taste is the sweetness of spring returning when you open back up again next year!
Posted by Leanne Feener at 11:30 AM No comments:

Thursday, September 15

FALL POOL MAINTENANCE

Jessica Graves

We know the calendar has only just turned to September, but as we look forward to the leaves changing and the temperature dropping, it’s never too early to start thinking about protecting your pool for the coming fall season.
We’ve collected 8 tips to ensure you take all the steps needed to ensure your pool can handle the harsh Canadian fall and winter months ahead.
1. Leaves are the enemy.
The first place you want to start when preparing your pool for fall is on the surface level. Make sure to skim the pool for debris and clean out the strainer baskets regularly. This is the time of year when leaves and twigs will be blowing around and the last thing you want is for them to fall to the bottom of the pool and sit there until next summer as some leaves can leave stains at the bottom of the pool. Be sure to skim the pool regularly to avoid a mess next summer.
2. Clean out your filters.
Just as regularly skimming the pool will ensure no fallen leaves or other debris get in, it’s also important to regularly clean your pool filter. Much like the debris that floats on top, filters can get clogged up with leaves and who knows what else. Keep it clean to ensure it’s in working order for next year.
3. Invest in a pool cover.
If you’re a new pool owner, you should invest in a good pool cover. A quality pool cover is essential when protecting your pool from snow and heavy rain. If you already have a pool cover, be sure to inspect it and make sure it’s in good condition after being used last year. Check for any tears or rips, and if you’ve had it for multiple years, consider getting a new one.
4. Maintain water levels.
Making sure your pool maintains a healthy water level is always important. Water will naturally evaporate over time, but if it becomes too low your pump could become damaged. A damaged pump is a costly mistake that is easy to prevent. Be sure to repair any leaks in and around your pool area. Fixing minor issues will ensure that your water levels remain consistent and your pump will not become damaged or broken.
5. Pool heater.
If you have a pool heater, be sure to contact a professional and ensure it’s working correctly. Once a year maintenance is standard for most pool heaters.
6. Prepare for freezing.
Be sure to check your pool’s pipes and pumps. As the temperature drops and water begins to freeze, make sure there’s no leftover water sitting around in your filter, pump or pool heater. Frozen water in pipes can cause them to crack which can be expensive to fix. Get the water out now.
7. Remove, clean and store accessories.
If you have external accessories like a diving board, water slide and ladder, be sure to remove, clean and store them away. The last thing you want is to leave them out all winter and find they’ve become worn and damaged over the season. Store them away now so you can use them later.
8. Drain the water.
Ideally, you should drain the water to about 5 inches below the pool skimmer. Late fall or early winter is a good time to discard any of the pool chemicals you’ve used this past season. You never want to reuse pool chemicals for the following year.
Consider these tips when preparing your pool for fall and winter this year. Did you know HomeStars has an entire category dedicated to pools? Check out our Swimming Pools, Spas & Hot Tubs category here to help you hire your next pool company.
Posted by Leanne Feener at 7:42 PM No comments:
Newer Posts Older Posts Home
Subscribe to: Posts (Atom)

Team BlueSky

My photo
Leanne Feener
Burlington, ON, Canada
Here to walk you through every step of the real estate transaction. Full service fully available.
View my complete profile

Blog Archive

  • April (4)
  • March (2)
  • February (4)
  • January (6)
  • December (1)
  • November (2)
  • October (2)
  • September (4)
  • August (2)
  • July (4)
  • June (1)
  • May (2)
  • April (1)
  • March (4)
  • February (5)
  • January (6)
  • December (4)
  • November (2)
  • September (3)
  • August (2)
  • June (1)
  • May (3)
  • April (1)
  • March (3)
  • February (2)
  • January (1)
  • June (3)
  • April (3)
  • March (1)
  • February (3)
  • May (1)
  • March (2)
  • February (8)
  • January (10)
  • December (1)
  • November (6)
  • October (5)
  • September (7)
  • August (4)
  • July (4)
  • June (13)
  • May (11)
  • April (10)
  • March (11)
  • February (6)
  • January (17)
  • December (5)
  • November (12)
  • October (12)
  • September (10)
  • August (2)
  • July (6)
  • June (13)
  • November (2)
  • October (3)
Picture Window theme. Powered by Blogger.