Pages

Thursday, September 27

Getting a Divorce? Think about the house!


Getting a divorce is tough enough, but having to sort out the house and finances can seem like a daunting process. Here’s a few tips on how to minimize your frustration, and financial exposure, during a divorce.
My husband and I have an agreement: If either one of us is unfaithful to our marriage vows that person walks away with nothing. Absolutely nothing. No car, no kids, no house. Nadda. And yes: we shook on it. We also meant it and, despite how ridiculous this gentleman’s agreement may appear to be, we share this story with family and friends, with full knowledge that our handshake would never stand up in a court of law, if it came to that.
But in era where almost half of marriages end in divorce, it was our way of trying, in a humourous way, to acknowledge that divorce and property is a messy business.
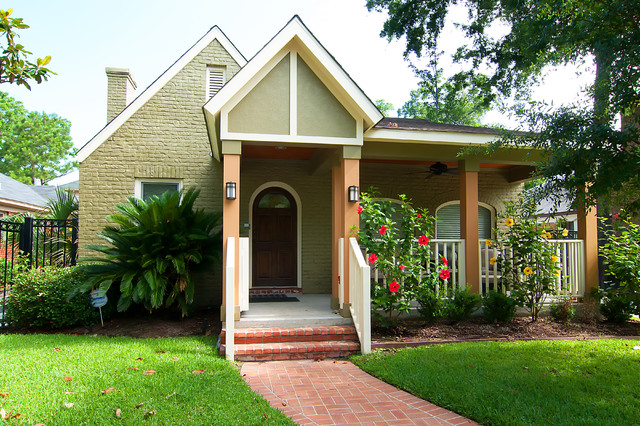
The best solution is, obviously, not to get divorced. But if separation is imminent in your life you may be curious as to how a family break up with impact the marital home.
There are three basic scenarios as to what can happen to your marital home.
Sole possession. This is when one partner opts to buy out the other partner. Often a paid appraisal is conducted, which provides a current or fair market value of the home. Then the spouse who wants to continue living in the home can obtain refinancing, which will pay the other person half of what the home is worth.
Co-ownership. This is typically only undertaken by partners who are going through an amicable divorce, as it means that both are responsible for payments and both are entitled to half the funds when the property is sold. The difficult component of this type of ownership, however, is that both people would be responsible for capital gains on their share of the profit. The spouse that remained living in the home, however, may be able to claim an exemption. Speak to a lawyer for more information on this option.
Sell. While it’s tough to uproot you and/or your family, selling can often be the easiest solution. By selling the marital home, both people are able to take their entitled portion of the sale and then able to pursue their own home ownership needs. Problems can arise, however, if the market is soft and you cannot get a good sale price for the home.
Regardless of what you and your former spouse decides to do with the home, you’ll want to consider the following:
  • Business as usual until there’s a settlement: Regardless of how bitter a divorce may become, it’s important to continue paying mortgage, property taxes and bills, at least until a settlement has been reached. Refusing to pay common debts will only hurt your future chances of refinancing and home ownership. If you find your partner is unwilling to help with the payments, simply keep receipts. Then use these receipts to seek reimbursement during the settlement process.
  • Separate your finances: As fast as possible, seek to separate your finances from your partner so you can start establishing good credit on your own. That may mean opening a separate bank account, or getting your own credit card.
  • Expediency is key: The sooner your divorce is finalized, the better you’ll be financially. That’s because mortgage professionals and other finance advisers may be unable to help you rebuild or move on until the settlement is signed and delivered.

www.teambluesky.ca

Wednesday, September 26

How to Paint Kitchen Cabinets


Want a major new look for your kitchen or bathroom cabinets on a DIY budget? Don't pick up a paintbrush until you read this!

The right cabinet color can transform your kitchen or bathroom's look. And because replacing cabinetry can be expensive, a fresh paint color could be the best bet for your budget. But before you start in on this seemingly simple DIY, keep a key point in mind. "The main issue is that with most woodwork — but specifically kitchen cabinets — is that it's finished with a glossy product designed to be wipeable, and that same property prevents paint from sticking to it," says painter Alex Davidson.

Although it's not as simple as painting your dining room, with the right prep, painting cabinets can be an affordable and lasting design solution. See what four painting professionals say about painting kitchen cabinets.
Should you paint your cabinetry? Before making any decisions, figure out what the existing finish is on your cabinet. If you're not sure, consider taking a door or drawer to your local paint supplier — he or she can help you with what you need to get your cabinet ready for painting.

Depending on the level of work, you may want to look into hiring a professional. "Think carefully before painting your cabinetry," says Davidson. "It can be a DIY, but it requires a lot of attention and care."

"Always consider the cost of possibly refacing your cabinets or replacing them altogether, and how that coordinates with your short- and long-term objectives," says Wade Thompson ofThomsonHoliday Painting.
How to paint your kitchen cabinets.

1. Remove the hardware and hinges and clean the surfaces thoroughly. Bob Miano of DeGeorge Custom Cabinetryrecommends using a clean, soft rag or T-shirt and mineral spirits or TSP (trisodium phosphate). Don't just wipe them down — give them a good scrub to remove old oils, waxes and grime. This is a crucial step. "Paint is a very forgiving material, but the one thing it refuses to abide is a dirty, greasy surface," says Philip Storey of Redhill Painting.

2. Lightly sand the painting surfaces to open the finish surfaces. If there are any dents or grooves in the cabinetry, you may want to fill them in with a good wood filler first. After sanding, use a clean cloth to remove any sanding dust.

3. Prime the cabinets with a stain-blocking primer designed for glossy surfaces.

4. Finish the cabinets with at least two coats of the paint you've chosen. Let the paint dry thoroughly and lightly sand between coats.

5. After everything has dried thoroughly, put your cabinets back together. "Be sure to keep everything organized," says Thompson. "Have a system for remembering the positioning of your cabinet doors."
Choosing the best paint for cabinets. If you're not working with a professional, look for paint at a local, reputable paint supply store, where the staff can help you pick the right product for your cabinets. Choose a paint that can stand up to repeated washing and is nonblocking, so it won't stick to itself when the cabinet doors are closed.

Also, know that dark colors tend to show imperfections in the paint and cabinetry much more than light colors do — and, contrary to popular belief, they usually highlight dirt more, too.

Having trouble choosing a color? Check out these kitchen cabinetry palettes.
Four experts' favorite paints for kitchen cabinets.
Alex Davidson: Kelly Moore DuraPoxy paint line, or Benjamin Moore's Regal Select line in a semigloss.

Wade Thompson:Benjamin Moore Advance— a new latex product that compares to the look of oil paint in the way it levels and performs.

Philip Storey: Fine Paints of Europe. Their durable paint products are available in both oil- and water-based paints, and are great for cabinets.

Bob Miano: Use the premium grade when using paint from major paint manufacturers, since they tend to be thicker and have more coverage. Avoid flat finishes, since they're much harder to clean.
What to watch out for.Painting cabinetry may seem like a quick and easy kitchen solution, bit it's a big job. Make sure you have the time, skills and patience for the task. Odds are, you'll be looking at this cabinetry every day — so make sure you have the ability to make it look good.

If you're feeling unsure,look into hiring a professional painter. While it may be more expensive, these pros can probably get the work done in much less time and with a result of much higher quality. "Always get a few opinions," says Thomspon. "Regardless of your decision, talking to several companies will be a learning experience." Many professionals will use spray applications to get the smoothest finish, which can make a huge difference.

Painting cabinetry can be a lot of work — but whether you hire a pro or do the painting yourself, the results are well worth it.

"Above all, have fun with the project," says Miano. "Remember, it's only paint."

www.teambluesky.ca

Monday, September 24

What to Look for in a Contractor's Contract


A contractor without a contract is just a worker and his or her word. Even the most honest person would be hard-pressed to keep track of all the conversations that go into planning for the average construction project. That's where a good contract comes in. Many a conflict can be avoided if both parties can simply consult the contract when there's a misunderstanding on either side. Contracts can save relationships, and your house. 

These 10 tips, while just a starting point, will get you thinking about the most critical thing to have in hand before work starts.
1. The contract itself. A contract protects the parties involved. Just because you had a great conversation during the first meeting at the house, and even though the work is only supposed to take two days, you'll regret not having a contract when one of you forgets half of that great conversation and the work isn't completed after two weeks.

2. A physical address. Should you need to track down your contractor after work has begun, you won't find him or her at a P.O. box. Ask to drop off the deposit at the physical location listed on the contract.


3. License. While in some cities getting a contractor's license may be more a matter of writing a check than verifying skill, check to see that your contractor lists a license required for the work being done. A license may mean that your contractor passed the required exams, or it may just mean the state knows where to find him to collect taxes. But it also means your contractor has done the paperwork and is playing by the rules.

4. Insurance. Injuries can occur on a construction site. If the location is your home and your contractor does not have the proper insurance, you may be held liable. Check with your locality for the proper amount of liability insurance, and if the contractor has employees, check to see whether he carries worker's compensation insurance.
5. Scope of work. There are many details to get right in a renovation, so write everything down before work begins. This can be the best way to get everyone on the same page. If your designer has drawn up detailed plans, make sure the contract references the designer and the date on the plans so you have something to point to should the finish on your woodwork be different from what you requested.

6. Duration of work.Though projects often take longer than predicted for many legitimate reasons — some caused by the client and some outside the contractor's control — put the expected project duration in writing. The important thing is not that your contractor shows up every day, but that he finishes the project on time. Having a timeline will help calm your nerves if progress hits a slow spot.
7. Exclusions. A good contract should include a list of exclusions. These might be related to areas that will not be visible until the walls are opened up after demolition, or the level of cleaning you should expect after the work is complete. Also, talk to your contractor about the likelihood of finding asbestos behind the walls. He won't be able to say for sure, but he can speak from experience and help you plan your contingency budget.
8. EPA lead safety certification. Contractors working on homes in the U.S. built before 1978 should be certified in lead-safe practices by the EPA. You can read more about the requirements here, but in a nutshell, it's all about minimizing and containing dust during work, which is vital for the safety of you and your family.

9. Payment schedule. While payment schedules can vary by the job, they should always be agreeable to both parties involved. In my opinion, payments tied to milestones in the project are better than those tied to percentages of completion. As long as you are confident that you're not paying for significantly more than what's been completed, you should be OK.

10. Warranty. The standard warranty for work is one year from substantial completion. If you've checked the contractor's physical address and gotten recommendations from people you trust, you'll know where to find him later if needed.
www.teambluesky.ca

Tuesday, September 18

5 Pro Tips for the Best Home Exterior Updates


Every homeowner knows how important curb appeal is — Houzz discussions are full of questions about how to update an exterior. But sometimes it's hard to know where to start. Should you put your budget toward new paint or your wilting flower garden? We asked Houzz designers and architects to give us their professional advice. From planning to painting, here are their best tips for exterior update solutions for all budgets.
Start with simple maintenance. Basic cleanup can go a long way in amping up your home's exterior and its curb appeal. Give your exterior a good power wash, touch up paint trim, mow your lawn and spread fresh mulch over flower and plant beds. If you're looking for a one-day fix up, take it down another level. "If it's an afternoon project someone is looking for, I'd suggest repainting the front door and adding some potted plants or shrubs," says designerJoe Human. "Small items such as flowers, new bark or edging and a new welcome mat are very quick and inexpensive ways to instantly add curb appeal."
Marry the house to its landscape. The architects and designers we talked with are almost unanimous — landscaping is what makes the biggest difference in exterior appeal. Whether you're aiming for a quick freshening up or a complete front yard overhaul, take the time to come up with a basic plan for your landscape. Aim for a good balance of lawn and plants. "Avoid just putting sod down and calling it a day," says Kyle Sheffield of LDA Architecture & Interiors. "Create a transition from the house to the grade by using species that descend in height from the house. This will give the appearance that the house is married to the landscape rather than plopped on a lot."

Look for the sight lines in your yard. Get a visual from the curb or drive by the space you want to update. "Identify the 'where,'" says Kim Thibodeau of Paradise Restored Landscaping. "The viewpoint that will pull you and your guest outside."

If you don't have time or a budget to plant anything new, do a big cleanup. Detail trees and shrubs, and edge flower beds. Add topsoil and mulch to even out the grade, and weed and get rid of dead plantings.
Refresh exterior paint. After landscaping, a new paint job is these designers' top pick for the biggest and most inexpensive way to update an exterior.

Keep your color palette simple for the most dramatic effect. "There's nothing worse than a home with too many elements, textures and colors mixed together to create a collage of exterior styles," says designer James Carrick. "Keep consistency and simplicity in mind to bring out the elegance and charm of a home."

Figure out what can and cannot have its color changed on your house — such as natural stone or brick that shouldn't be painted — and use that as the basis for your palette.

Many designers suggest sticking with a two- or three-color palette for the siding, the trim and an accent. "If you'd like to use the three-color palette, be sure to balance where you want the accent color so it doesn't overwhelm the siding and trim color," says Sheffield.

Sheffield also recommends making the accent color the darkest of the three color choices. Use your color to emphasize the great parts of your house and draw the eye away from any negative features. Architect Thad Siemasko often uses exterior colors to exaggerate a paneled door, a slightly unusual trim or shutters. "We often tie the shutter, front door and garage door colors together as a deep highlight for a good effect," he says.
Take care updating older homes. Updating any part of your home's exterior should be done with care, but older houses can come with their fair share of woes. Rotted sills, leaky gutters, failed masonry joints and deteriorating windows can often be revealed through the updating process. "Older homes generally have some degree of damage from water infiltration over the years," says architect Jordan Parnass. "Renovating the exterior can be a great way to verify that vapor barriers and insulation are up to date — and inspect window frames, gutters and trim for any damage."

Even painting can cause some problems. "Painting on an older home can be difficult, depending on how many layers of paint are on and how well it's been painted over time," says Human. "This can cause more prep work and material cost." If you're worried that your home's age may cause complications, it may be best to consult a professional.
Pay attention to architectural details. Window shutters, molding around windows and doors, trim with backband and other exterior details can all add interest to exterior styles. And energy-efficient windows, new trim, gutters and siding can improve performance as well as aesthetic. "Anything that improves the building envelope as well as curb appeal will go a long way, especially if you're going to be selling your home," says Sheffield.

If it's in your budget, it could be worth considering an update to your home's roof. This often-overlooked part of the exterior can make or break a home's curb appeal. "Think of it as the cap or crown to your home," says Human. "If your whole house is spotless and the roof is looking tired, it will bring the whole thing down."

Monday, September 17

New front door can transform exterior


New front door can transform exterior

Transform your home with a new entryway and take advantage of the energy-saving features as well as the fresh, welcome appearance.
Photo courtesy Debbie Travis
Q: We will be selling our house in the fall and want to give it some added curb appeal. How much work and expense is involved in putting in a new front door? I was thinking of adding side glass panels.
A: Replacing your entry door will not only transform the exterior of your home, but also your front hall. Any rooms that open onto the hall will reap the benefit of a new design, and if you add glass panels, more light.
There’s a lot to consider, and a wide choice of style and colour. Entrance doors come in wood, fibreglass and steel.
Wood is a traditional favourite with authentic designs to match your architectural style, whether Victorian, Colonial or Craftsman. Fibreglass and steel doors look like wood and offer low maintenance, weather resistance and durability. They’re also budget friendly.
Various designs available with either partial or full privacy, while allowing light to shine through. Glass inserts or metal fretwork can be installed as part of the door as well.
The opening will have to be enlarged if you add side panels or a wider door. A professional contractor can give you an estimate of cost. A wide door adds room to manoeuvre, whether you are carrying a baby, a bag of groceries, or need extra space for a wheelchair or walker. That’s one more important element to consider.

Contractor Tips: How to Shop for Your Remodel


Roughly half the costs of a remodel are for materials, so it pays to be mindful of potential pitfalls. If you're a DIYer, avoiding some minor and major mistakes can help you make the most of this significant investment. You probably already know it's best to buy well-tested quality materials from trusted local vendors and to install classic, long-lasting materials that will be around for generations. Here are more tips I've learned over the years that can help you pick out the best materials and products for your home.
1. Know the pitfalls of buying off the shelf. Check the box. Does it look like it has been opened or returned? Don't buy it. Returned items may have damage and missing parts.

You can get some great deals on good products at your local home store, but you have to know what you're looking for. For instance, plumbing fixtures should be made of brass, not metallic-looking plastic. And cheaper paint often requires more coats and fades more quickly.

2. Get recommendations for showrooms and lumberyards. A good builder should have established relationships with reps he or she trusts, so use the recommended suppliers if you can. If you're a DIYer, try asking around for some good suggestions. When all else fails, add 30 percent to any delivery time frame you're told and build a healthy contingency fund into your budget, just in case.
3. Just because it looks like a duck ... A lot of houses are still piped with copper, so repairs and remodeling will generally be done in copper as well. Half-inch copper pipe is 5/8 inch in diameter, but the thickness of the copper depends on the type. Many stores sell type M and L. Type M is cheaper because it's thinner — but saving money in materials now could mean tearing open walls later to find a pinhole leak that has sprung.

Whether you are paying someone else or doing work yourself, labor is expensive. Buy quality materials so you don't have to do the work twice.
4. Sometimes you don't get what you thought you were paying for. In my experience, some brands spend more on advertising than on making quality products. Do your research and make sure the product you're buying is current. The situation is always changing, but make sure you know what you're getting and who you'll call if it turns out to be a dud.
5. Let someone else be the guinea pig. I have tested materials and products on my own house over the years so I can vouch for them in my work. If you are not in the business, you should be buying products that have been well regarded for many years. Even if you are trying to remodel your home using environmentally friendly materials, you don't have to use products that haven't stood the test of time. True linoleum flooring (not vinyl, which people often call linoleum), like in this photo, has been around for more than a century and is a hypoallergenic natural material, for example.
6. Buy local. There are many reasons to buy local and support your region's economy, but two big ones have to do with shipping. Make sure to factor in the cost of shipping when pricing out materials. A local vendor will usually not charge extra for shipping, and you can schedule the delivery. Shipments of online purchases can result in headaches if no one is around when a big, heavy delivery shows up. If you are concerned about the environment, the distance a product ships should always be a concern. Bamboo flooring is made from grasses that are rapidly renewable, but if it's coming to you from across the world, a flooring product made close to home might be a greener choice.

Galbraith & Paul, the manufacturer of this wallpaper, is a local company in my hometown of Philadelphia.
7. Buy salvaged. You can often get better-quality building materials with more character for less money by buying salvaged. You will pay more in labor, but once again, this is an opportunity to support your community.

Sinks and tubs are good if the finish isn't damaged, but avoid faucets unless the seller can show you they work without leaks.

Doors, hardware and masonry are all great items, and stone, wood and glass are great materials, to buy salvaged. With light fixtures, keep in mind that they may need to be rewired, but this is a way to keep a great period fixture out of the Dumpster.
8. Buy extra. "Waste" is the term we use for extra materials ordered, because the cutoffs usually end up as just that (unless they're recycled). The best way to figure out how much waste to order is by following a manufacturer's or installer's recommendations.

In the absence of those, use these tips. If you are confident about your measurements and the method of installation, you could get away with ordering 10 percent more of items like flooring or wall coverings, but 15 percent waste is a safer bet. If the item is special order, 15 percent is the minimum, and 20 percent may make sense depending on the situation.

Store leftovers of items, like tile and grout, in labeled containers in the basement in case repairs are ever needed.
9. Have someone else check your work. Before you approve a special order, especially for windows and doors, have someone else familiar with the job look over the order. You can't send a custom door back because you didn't notice they got the door swing wrong or because the window is designed for 2-by-4 walls, not 2-by-6.
10. Buy early. Stopping work to wait for materials to arrive is costly. Double the lead time you were told and you'll usually be safe. Delays happen all the time.

If the materials are onsite, the contractor can check measurements and answer questions that the spec sheet doesn't address.

If you don't want to expose items to theft, store the materials offsite where your general contractor can get to them, but don't try to time material deliveries for the moment they're needed.