Pages

Tuesday, October 23

HOW TO PLACE SHOWER CONTROLS


With some careful planning, your next shower can be a complete joy to use. No blast of cold water when you turn it on, a controlled amount of water falling from each fixture, water that doesn't spray out the shower door and a handheld cord that doesn't wrap around fixtures. Here are some tips on planning the perfect shower experience through the placement of your fixtures.
Many factors influence where to put shower controls. Pipes, heating ducts, exterior insulation, electrical wires and other bits of your home's inner workings hide behind your bathroom walls. Sometimes the structure of your home gets in the way of the perfect control placement. But with care a professional can install a system that works for you.

Tip: Arrange controls for multiple showerheads in an order that would make sense to a guest. You can see multiple showerheads, a steam head and body jets in this shower. Since the rain head is the highest fixture, I'd give its control valve the highest placement. You can have a professional install things any way you like — there's no set rule — but try to create a sensible system from the perspective of someone who has never used your shower before.
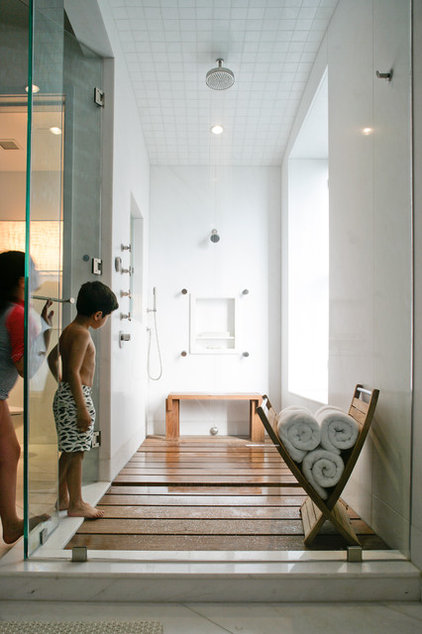
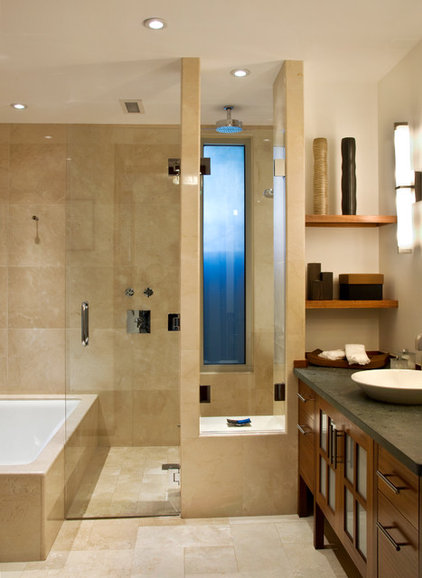
There's no need to worry about splashing here, because this entire bathroom is a wet room. Having the shower's controls at the opening of the shower makes heating things up easy and keeps the homeowners from getting wet in the process.

Tip: When designing a barrier-free bathroom like this, extra care and attention need to be taken where the tub waste and water supply penetrate the floor. Make sure that the floor is angled toward the drain and waterproofed with sheet membranes and waterproofing products, like Schluter's Kerdi Fix or Noble Company's Noble Sealant 150 (regular or low-VOC version).
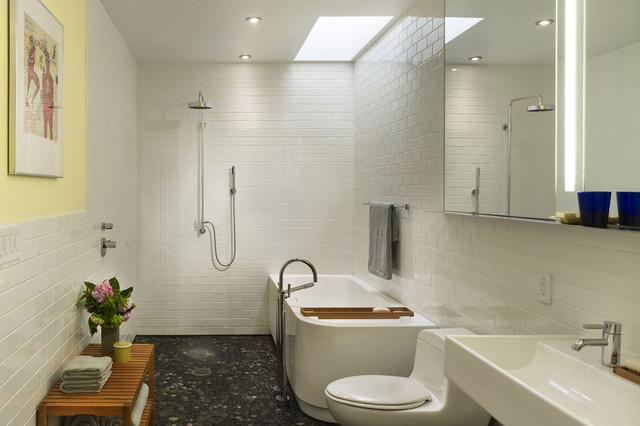
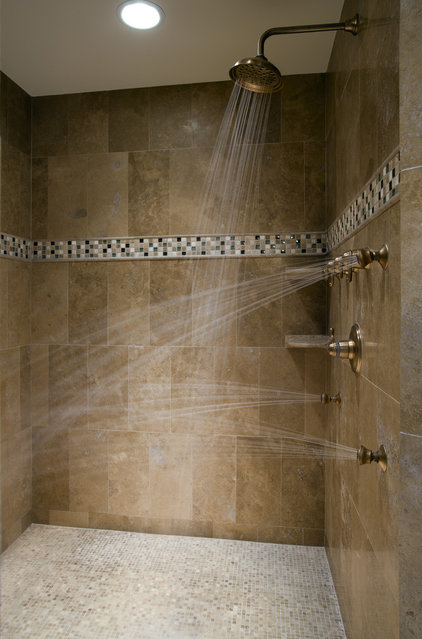
For a handheld shower control, consider the natural arch of the cord. I've found the cords want to curve at roughly 8 inches (20 centimeters). Notice the perfect placement of the shower's handheld cord in this photo. It lines up with the temperature control in middle, and the hose connects to the wall right in line with the lower control valve.

Tip: Have your tile layout ready if you want the hose's connection to fall in the center of a tile or on a grout joint. Siting the connection on a grout joint is easier for the tile installer, but most times it looks best to have it entirely on a full tile.
The entry tends to be the most convenient location for the control valves. Placing a handheld shower nozzle closer to the bench makes shaving easier.

Tip: If you cannot install the handheld to be accessible from the bench, consider a low shower niche on the same wall for storage or a place to rest a leg while shaving.
I love this shower and can only imagine how tricky it was to build and waterproof. When you have only one wall to place plumbing on, make sure that the wall is framed or built with the plumbing layout in mind.

Tip: Decide on grout spacing in advance — often this just means coming up with a simple sketch for your plumber. If you have no opinion, you'll most likely get what the plumber thinks looks best, which might not fit with your views.
When building a shower with a window, avoid wooden windows and make sure the shower's waterproofing system ties into the window's frame. Remember, windows move! Allow room for expansion and contraction when you're tiling to take moisture and thermal changes into account.

Tip: In this shower, the door shields the user from that first cold start-up spray. When you select your final shower fixture locations, remember that shower doors open both ways. By adding a separate side panel that the door hinges off of, it can open further into the shower without hitting the shower's fixtures.
Body jets should never face the shower entry or door. When placing jets, consider how the spray will bounce off bodies and where it will land.

Tip: Jets should be sized to the user's body and installed to hit shoulders and other areas needing a massage. Consider installing them from both sides for a full-body soak!


www.teambluesky.ca

No comments:

Post a Comment